[Crops 101] How to Sow & Harvest Potatoes
![[Crops 101] How to Sow & Harvest Potatoes](/cms/uploads/news_6895c3a14d855.jpg)
In this tutorial, we focus on potatoes: from planting to harvest, we guide you through every step.
What You Need To Know About Potatoes
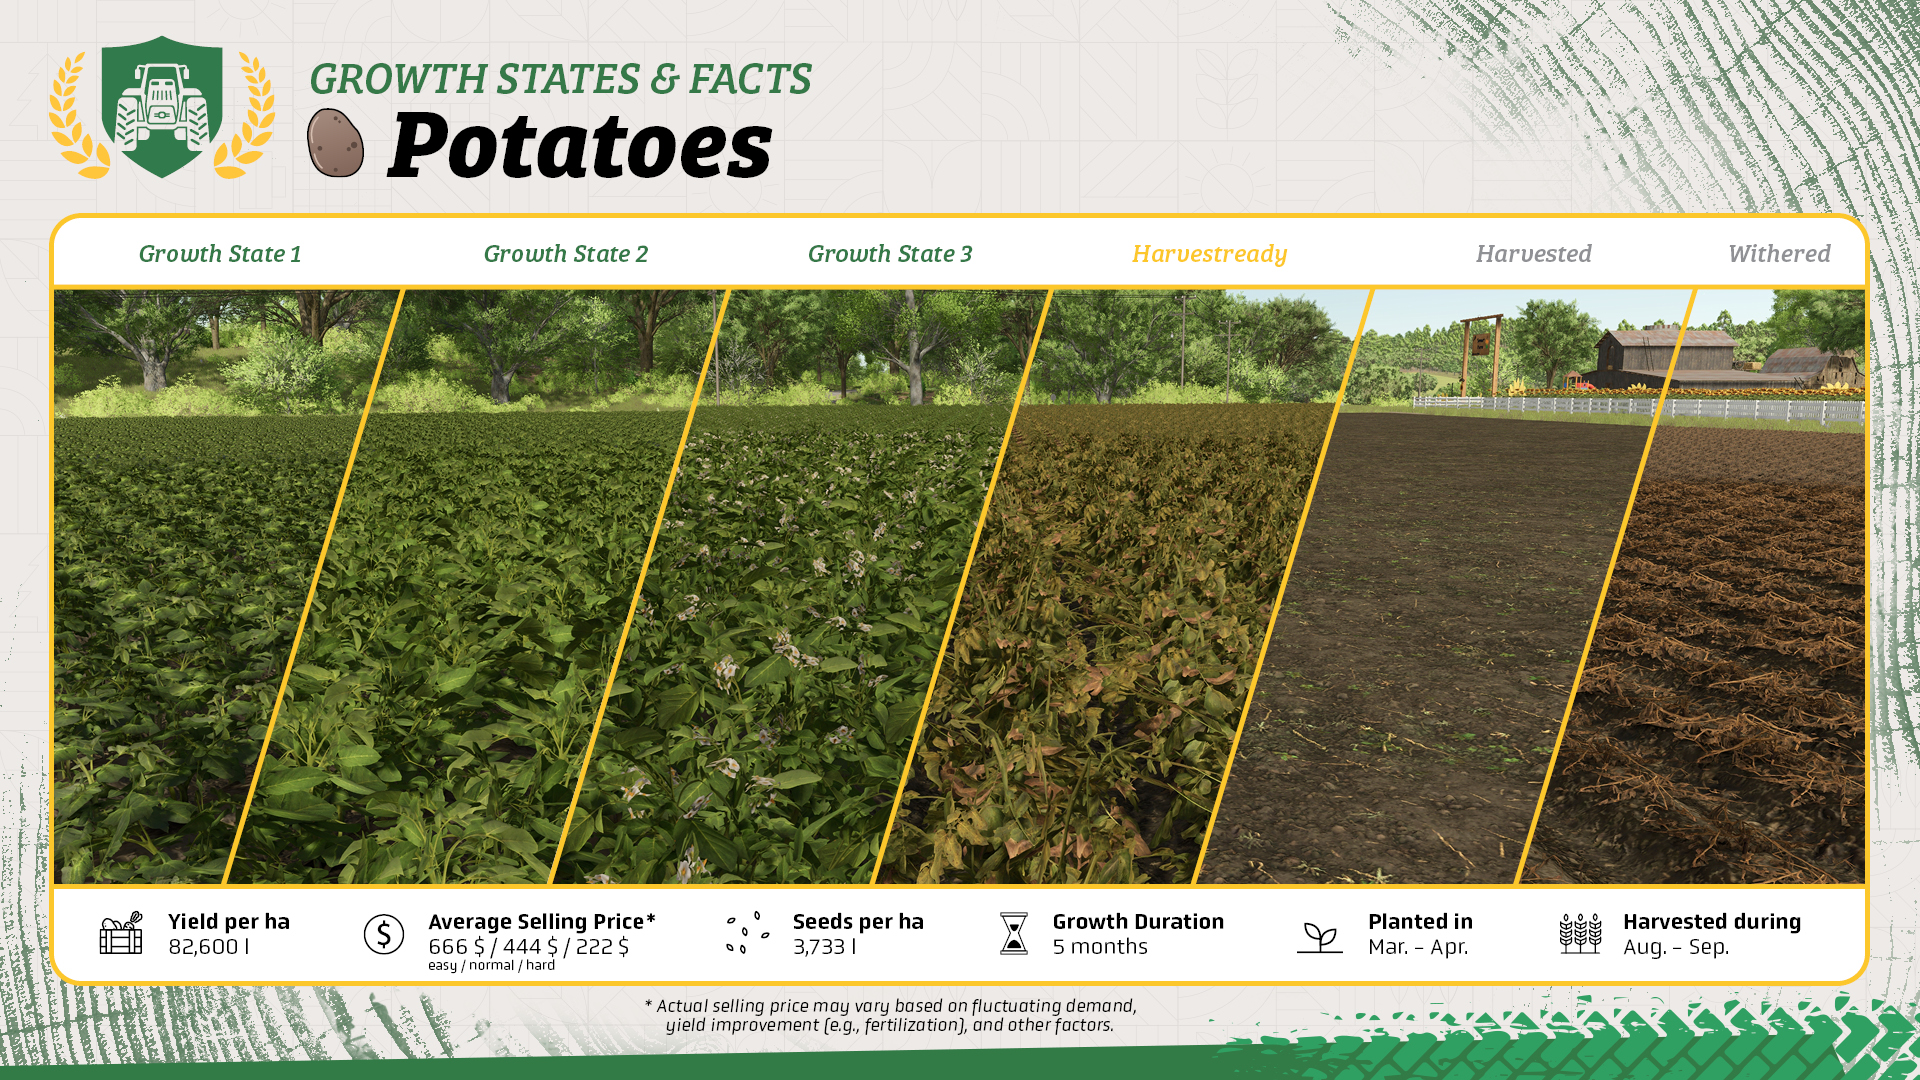
- Pigs can be feed with potatoes
- In the mood for chips? Process your potatoes at the potato processing plant!
- Potatoes can also be processed into potato soup at the soup factory
- Plant them from March to April
- From August to September, potatoes are ready to harvest
What You Need For Potatoes
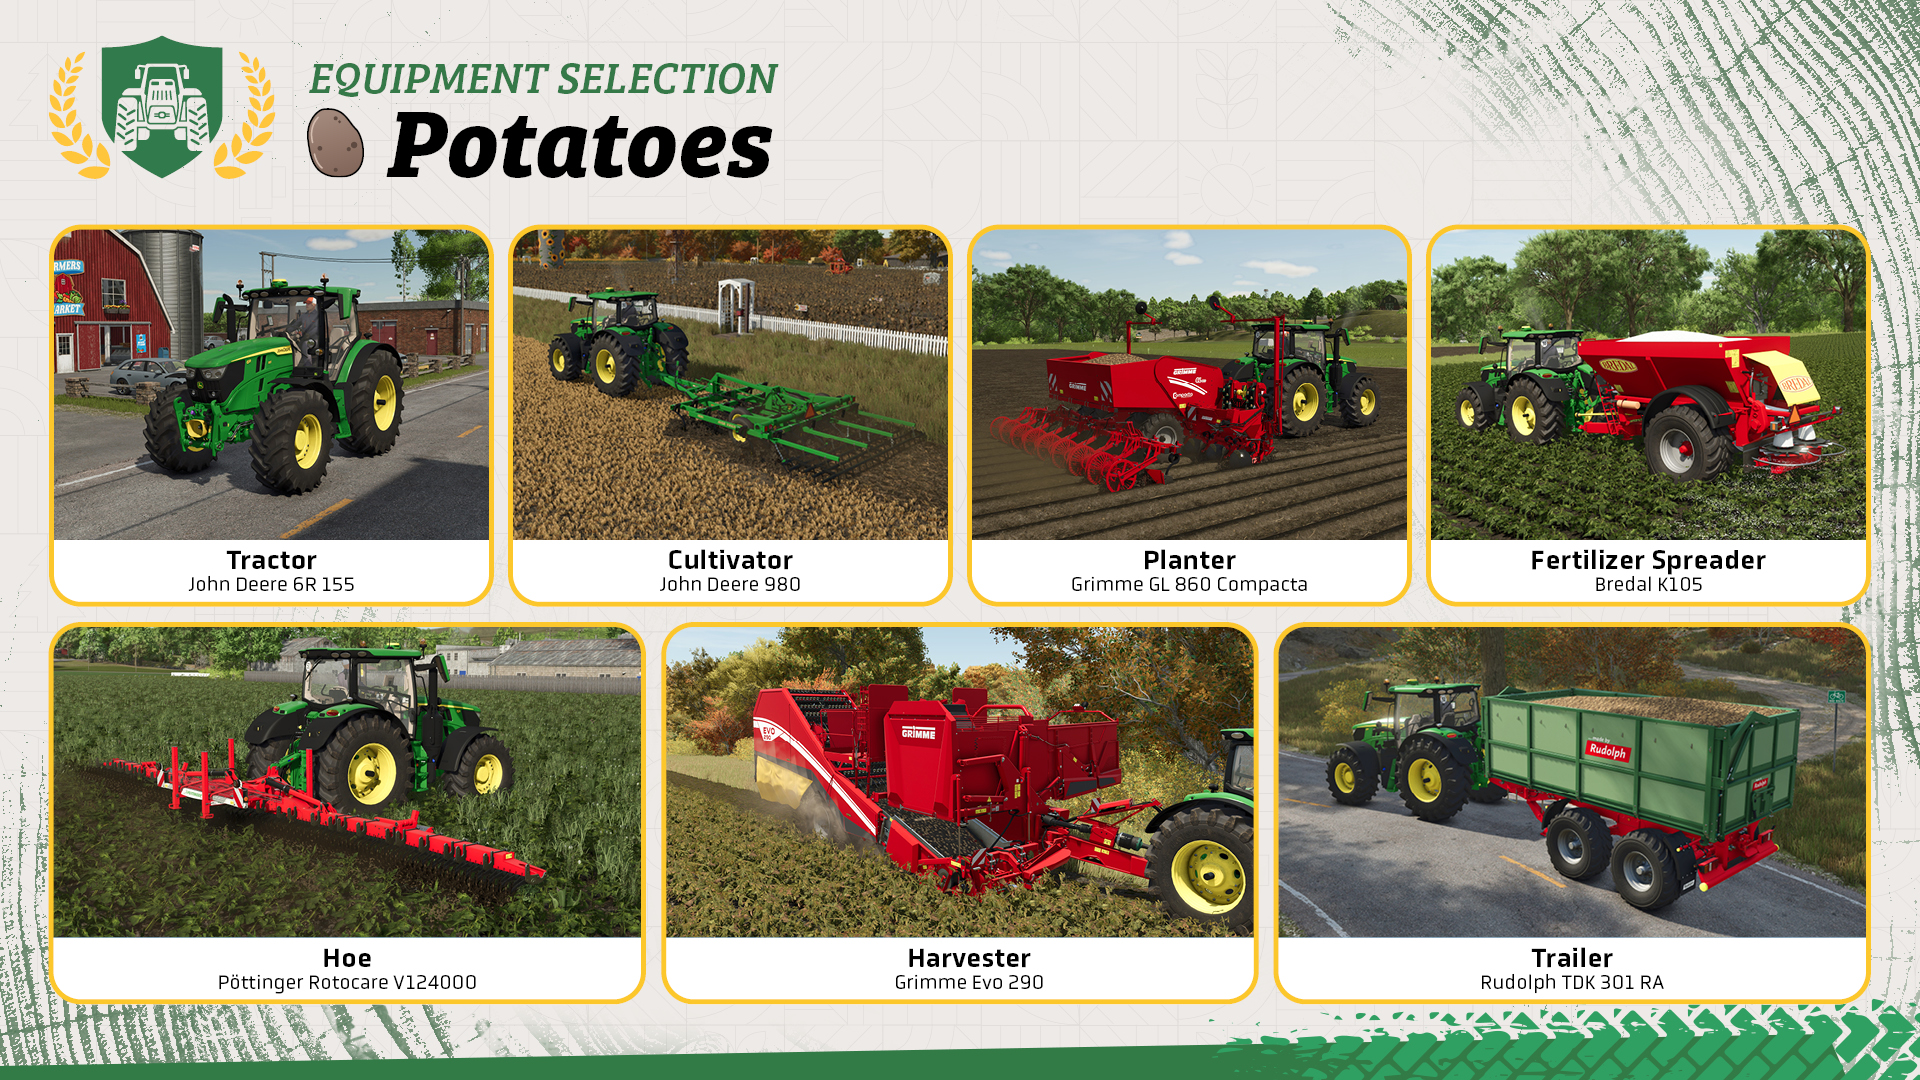
We’ll cover the necessary equipment in this chapter - feel free to skip ahead to the growing guide if that’s what you’re looking for
- You need a tractor with front loader attachment to operate tools and transport resources.
- You need a pallet fork to transport your resources.
- You need a subsoiler to prepare your field for planting.
- You need a potato planter and seeds. You can use potatoes from a previous harvest for refilling.
- You need a fertilizer spreader, fertilizer, and lime. These things are optional, as they are only needed to increase your harvest.
- You need a hoe to prevent weed from growing and spoiling your harvest.
- You need a special potato harvester.
- You need a trailer to collect and transport your harvest.
Let’s go to work!
If tool handling proves difficult, here’s some support that might help:
How To Operate Your Machinery
- Align your vehicle: Drive your vehicle next to the tool you want to use. Press the designated button to connect.
- If necessary, fill your machine with the required resource (seeds, fertilizer): Place the machine you want to fill next to the required resource and press the designated button to refill.
- Drive to your field and use the machine: Just unfold the machine or vehicle, lower it (if needed) and you are ready to go!
Step by Step: How To Plant Potatoes
With this step-by-step guide, your harvest of potatoes is safe:
- Applying Lime: Fill lime into your fertilizer spreader and cover your field.
- Plow your field: Switch to your subsoiler and prepare your field for planting.
- Planting: Prepare your potato planter and commence planting potatoes.
- Fertilizing: Maximize your crop yield by fertilizing twice during two distinct growth phases of your plants.
- Weeding: Get rid of weeds as soon as they show up. They mess with your yield and get tougher to kill the longer you wait. Use a hoe. Later, you’ll need a sprayer to deal with them.
- Harvest: The fun part starts now: use your potato harvester and start harvesting.
- Selling or keeping potatoes: With your trailer full of potatoes, you need to decide: Sell it at a selling point, produce them into soup or chips, or feed them to your pigs? The choice is yours to make.
Well done!
Take care of your machinery and don't forget to clean them sometimes. Head back to the Academy for more tutorials. Keep on farming!


