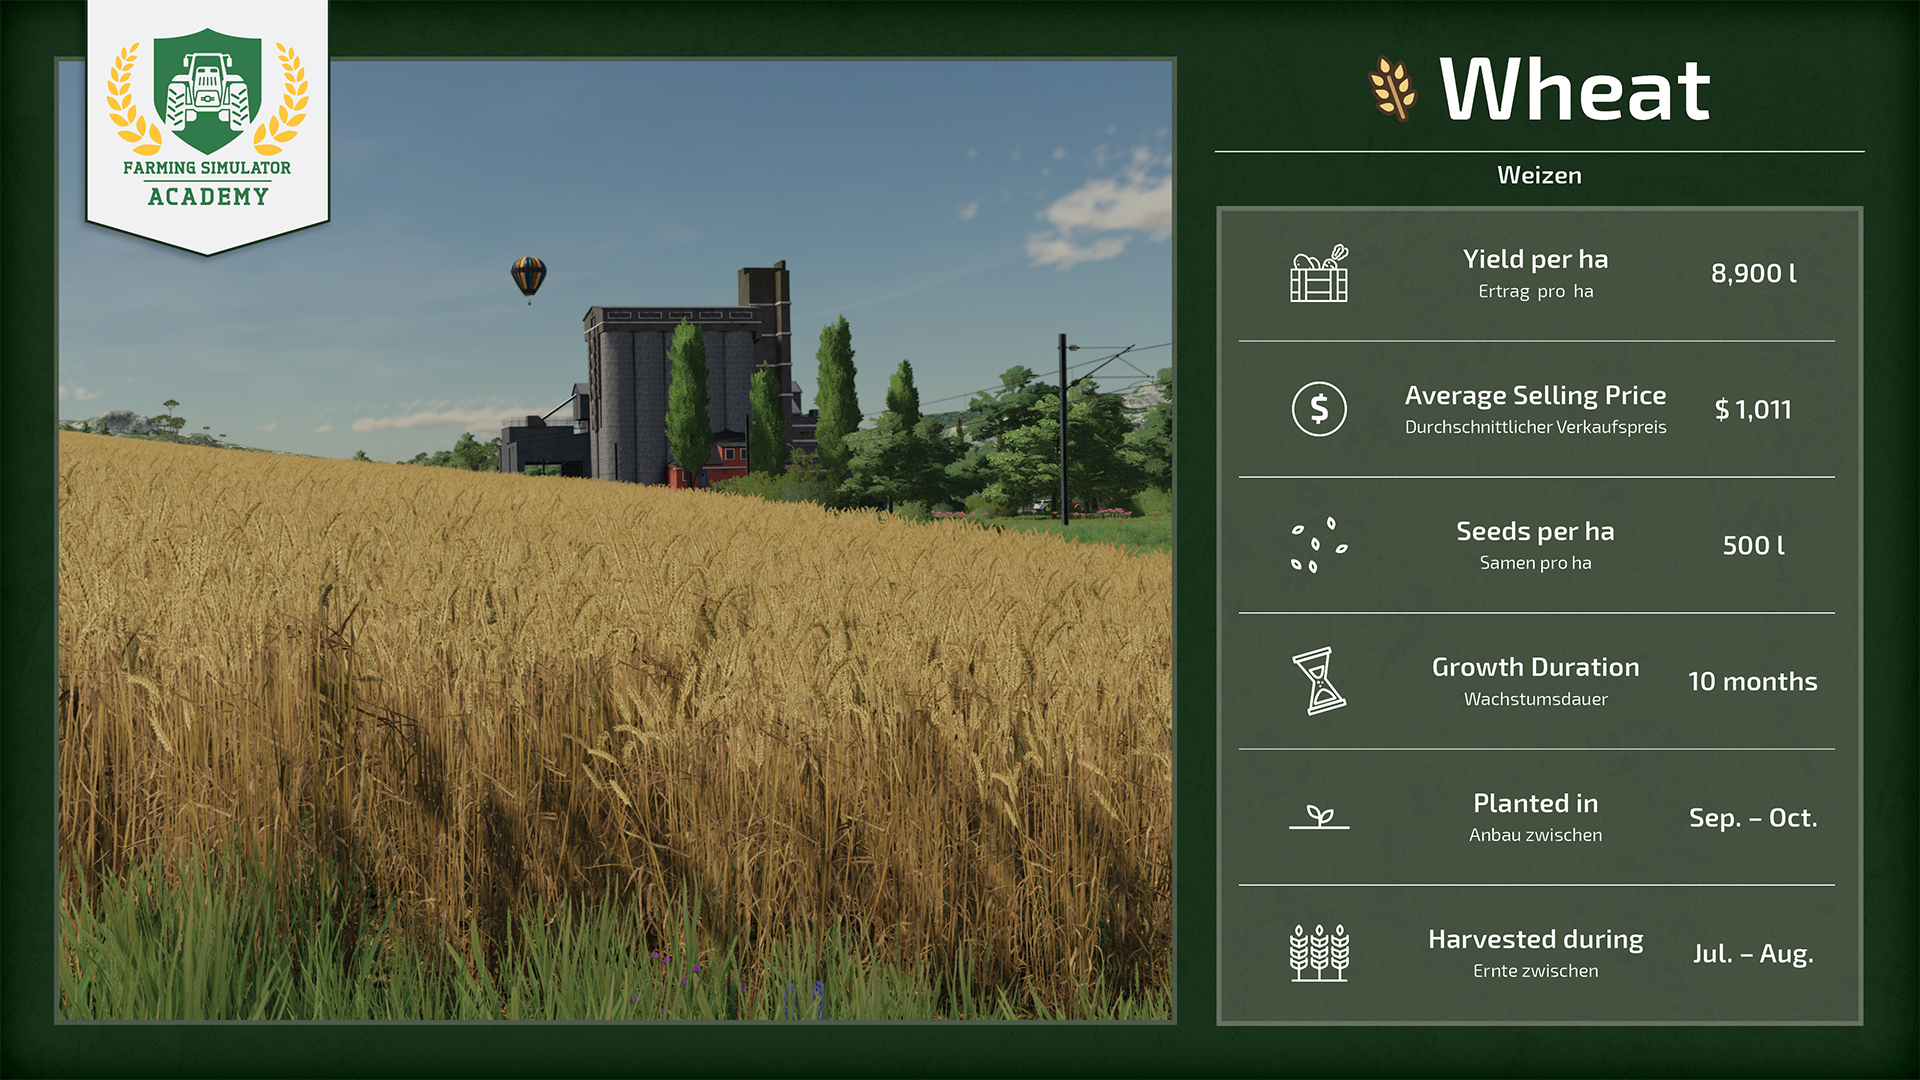
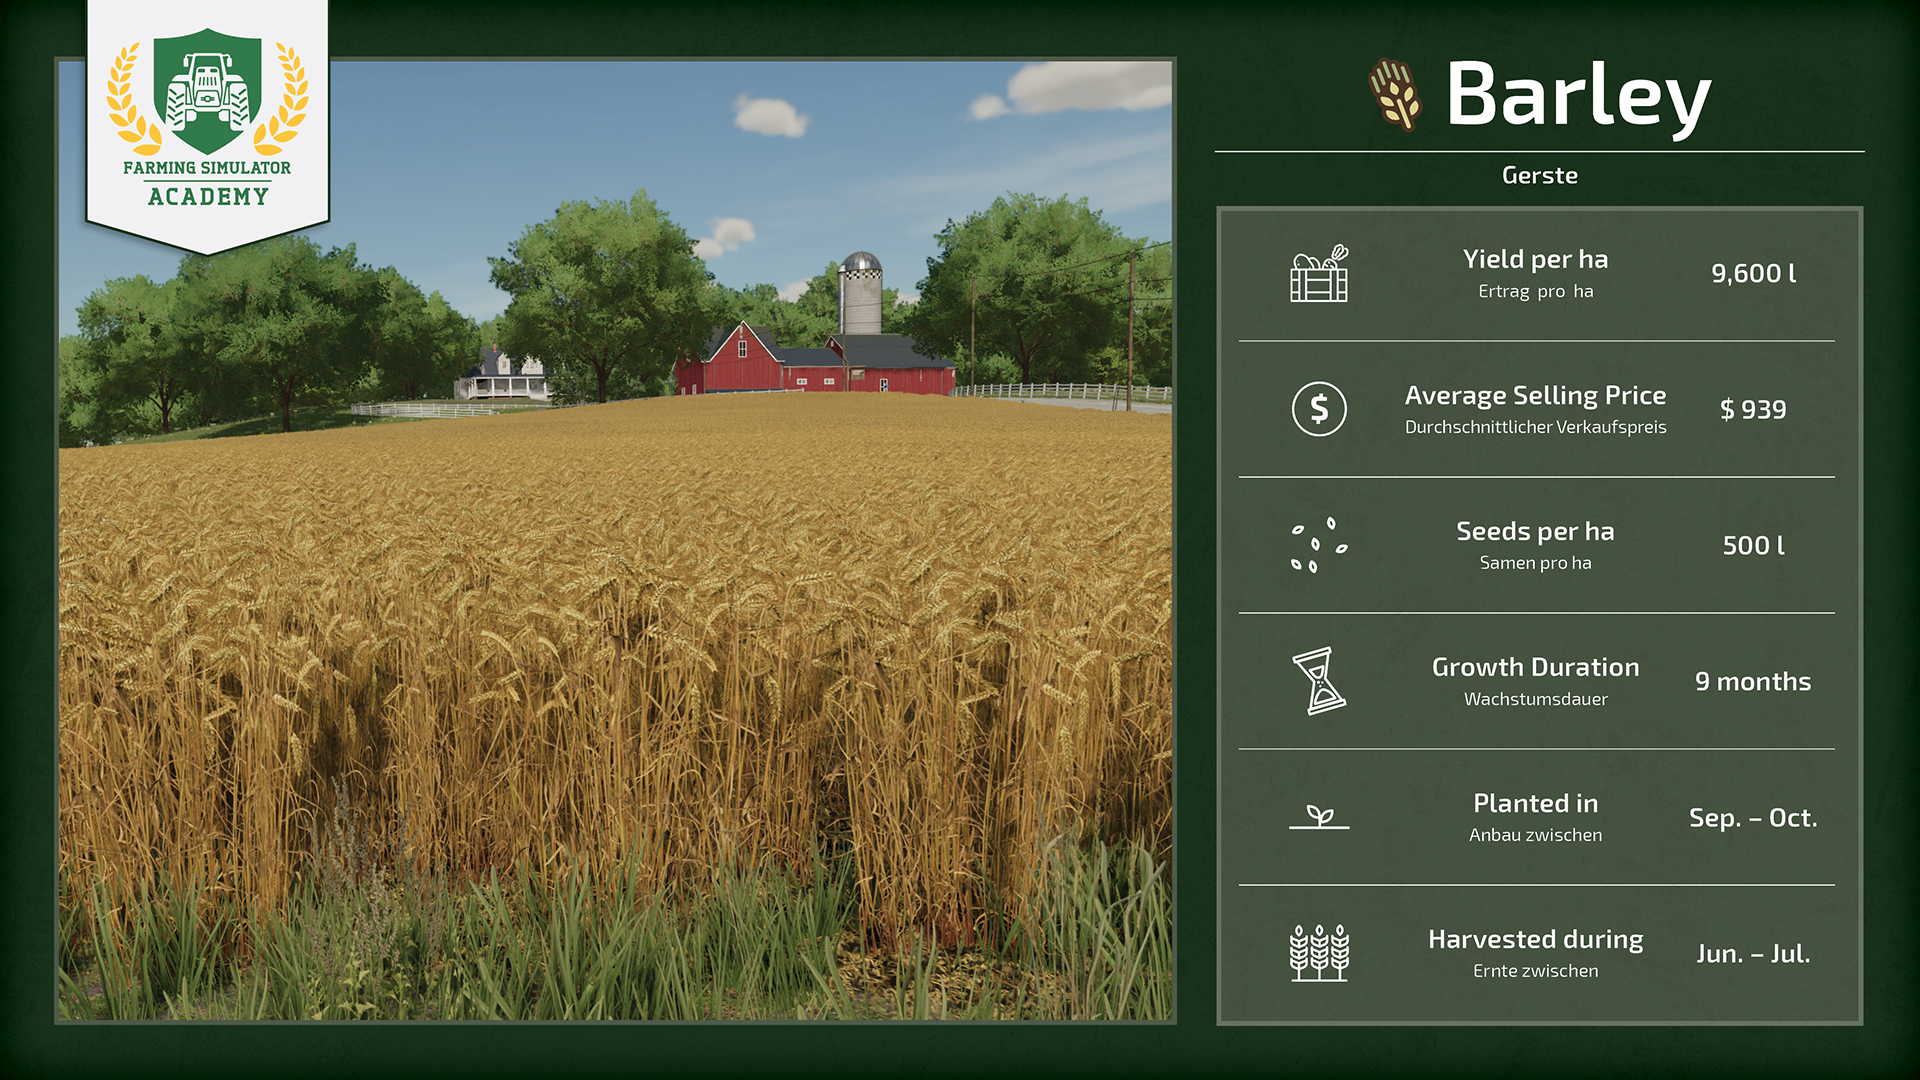
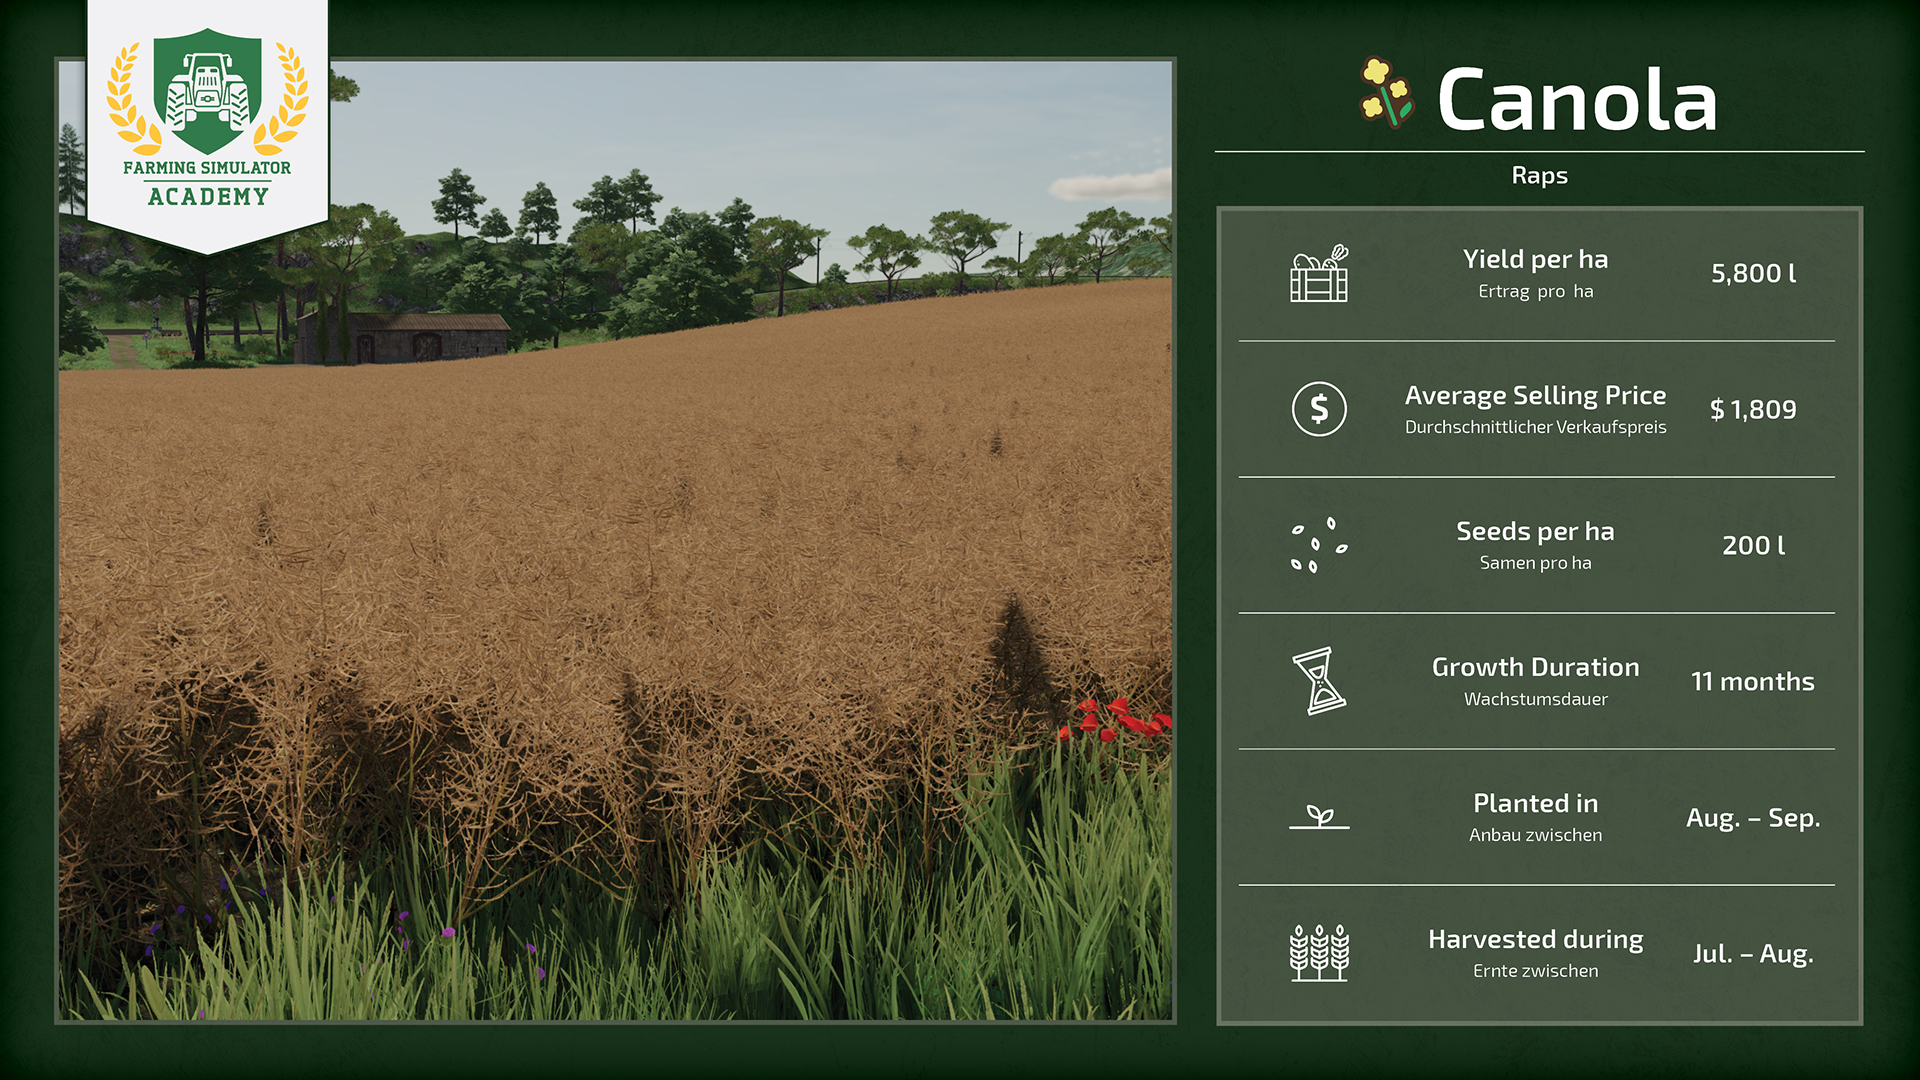
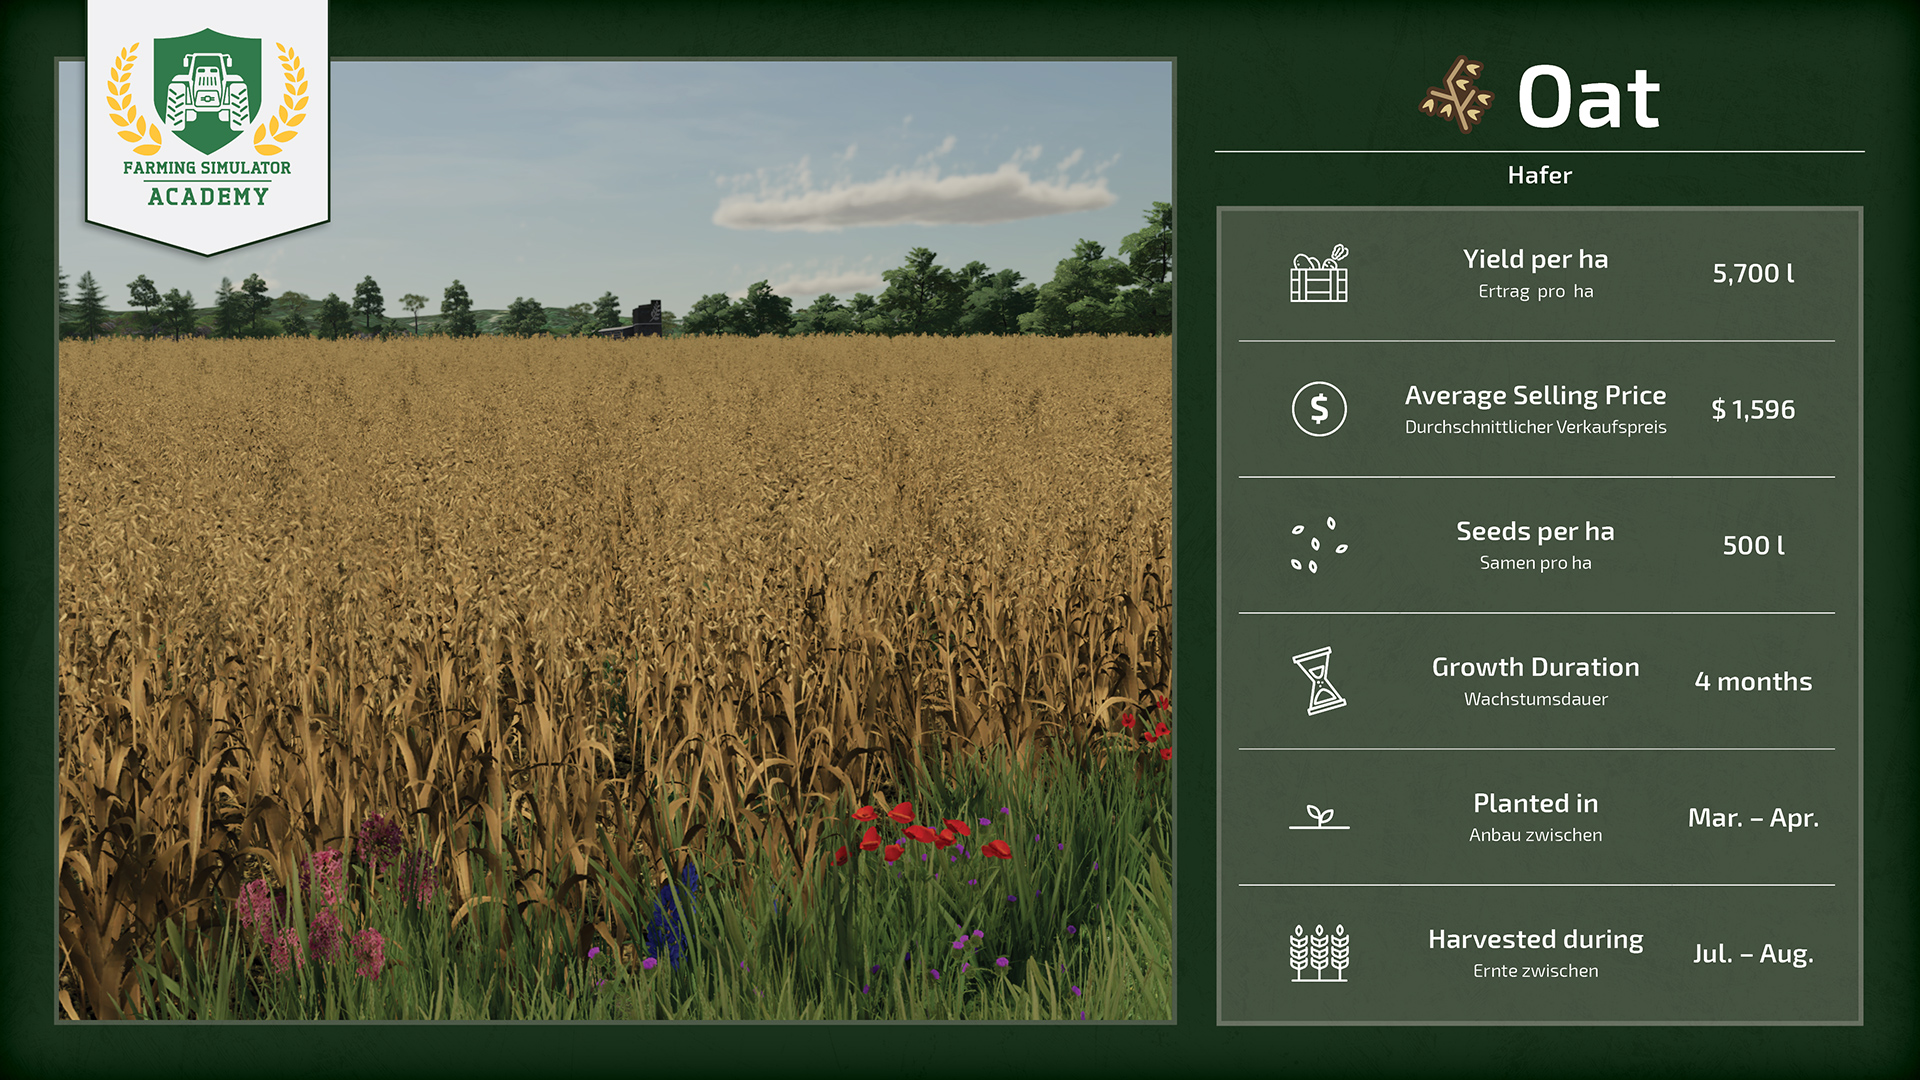
[Crops 101] How to Sow & Harvest Grains (Wheat, Sorghum, Barley, Oat, Canola, Soybeans)
![[Crops 101] How to Sow & Harvest Grains (Wheat, Sorghum, Barley, Oat, Canola, Soybeans)](/cms/uploads/news_659ea3673f7ec.jpg)
Welcome to your next "Crops 101" lesson of the Farming Simulator Academy! Today, we’re focusing on grains. In simple terms, grains are plants that grow from a single seed and produce even more seeds we want to harvest.
Article Content (click to jump)
Step-by-step instructions & tips
The process is always the same with grains, hence why we group them together, including soybeans. We’ll show you how to sow, harvest and sell grains. Let’s start, shall we?
Here are more crop tutorials ➡️ VIDEO TUTORIALS
What is Special About Grains?
- Grains are the easiest crops to start with
- If you play with seasonal cycles, you start in August and can only seed canola
- With a harvester and grain header, you can harvest all types of grains
- Harvesting wheat, barley and oat also produces straw for your animals
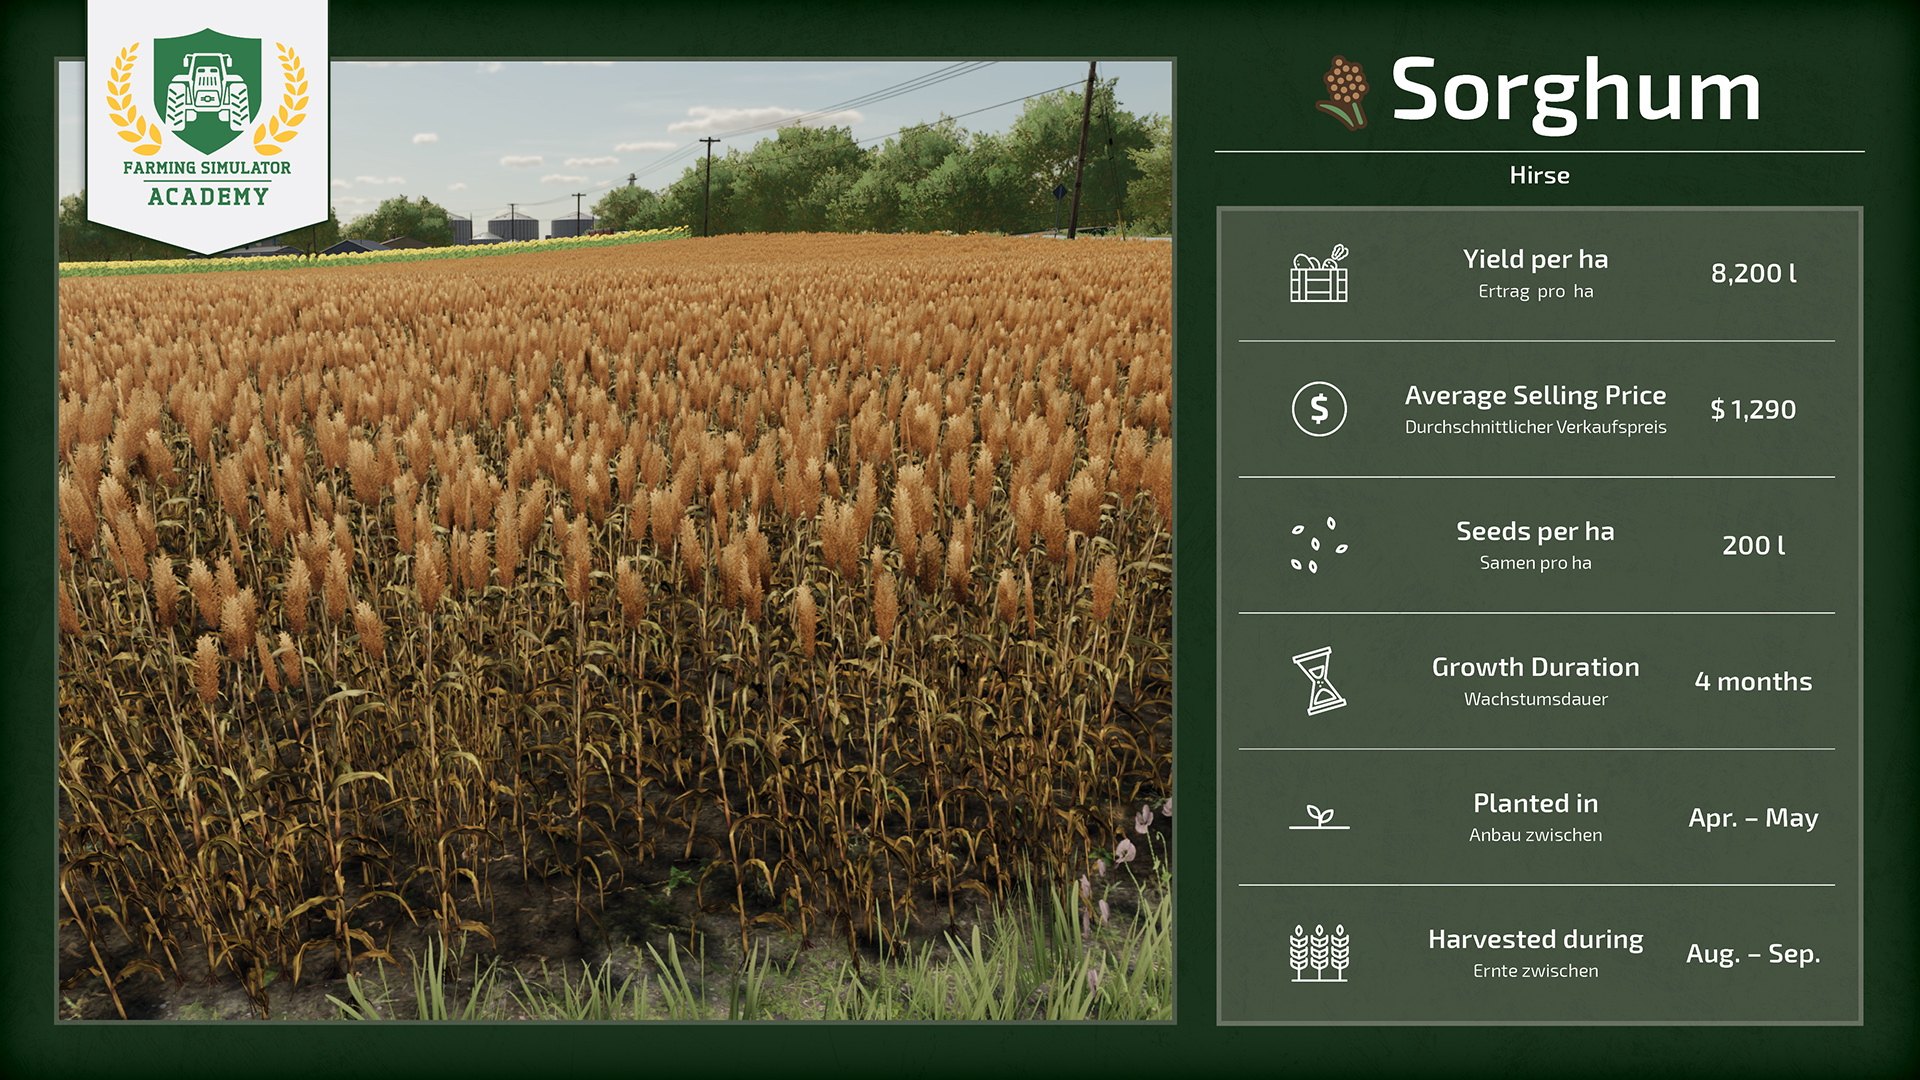
- Wheat, barley, sorghum, canola and soybeans can be fed to pigs
- Wheat, barley and sorghum can be fed to chicken
- Sorghum and oat can be fed to horses
Which Crops are Grains?
What You Need for Grains
Let’s take a look at everything you need to sow and harvest grains. All the tools and machinery needed are the essentials you should invest in right at the beginning anyway. Most of them you’ll need later for other crops, too.
- You need a tractor, of course, to attach the following tools and operate them.
- You need a cultivator to prepare the field for your crops.
- You need a seeder and seeds. In the ‘seeders’ category of the tools-tab in the shop, you find seeders to sow grains. You also need to buy a Bigbag pallet of seeds from the ‘objects’ section.
- You need a fertilizer spreader, fertilizer and lime. Without these, the income from your harvested crops will be lowered. For beginners, artificial fertilizers are the best choice. You find both lime and fertilizer in the ‘objects’ section of the shop. A fertilizer spreader is found in the fertilizing technology category. But, not all spreaders can spread lime!
- You need a weeder to get rid of the weeds that will soon pop up. Otherwise, the yield will be reduced, and you won’t get as much money out of it
- You need a harvester with a grain header to harvest your crops.
- You need a trailer to transport and sell the harvested crops.
Equipment Selection (recommendation)
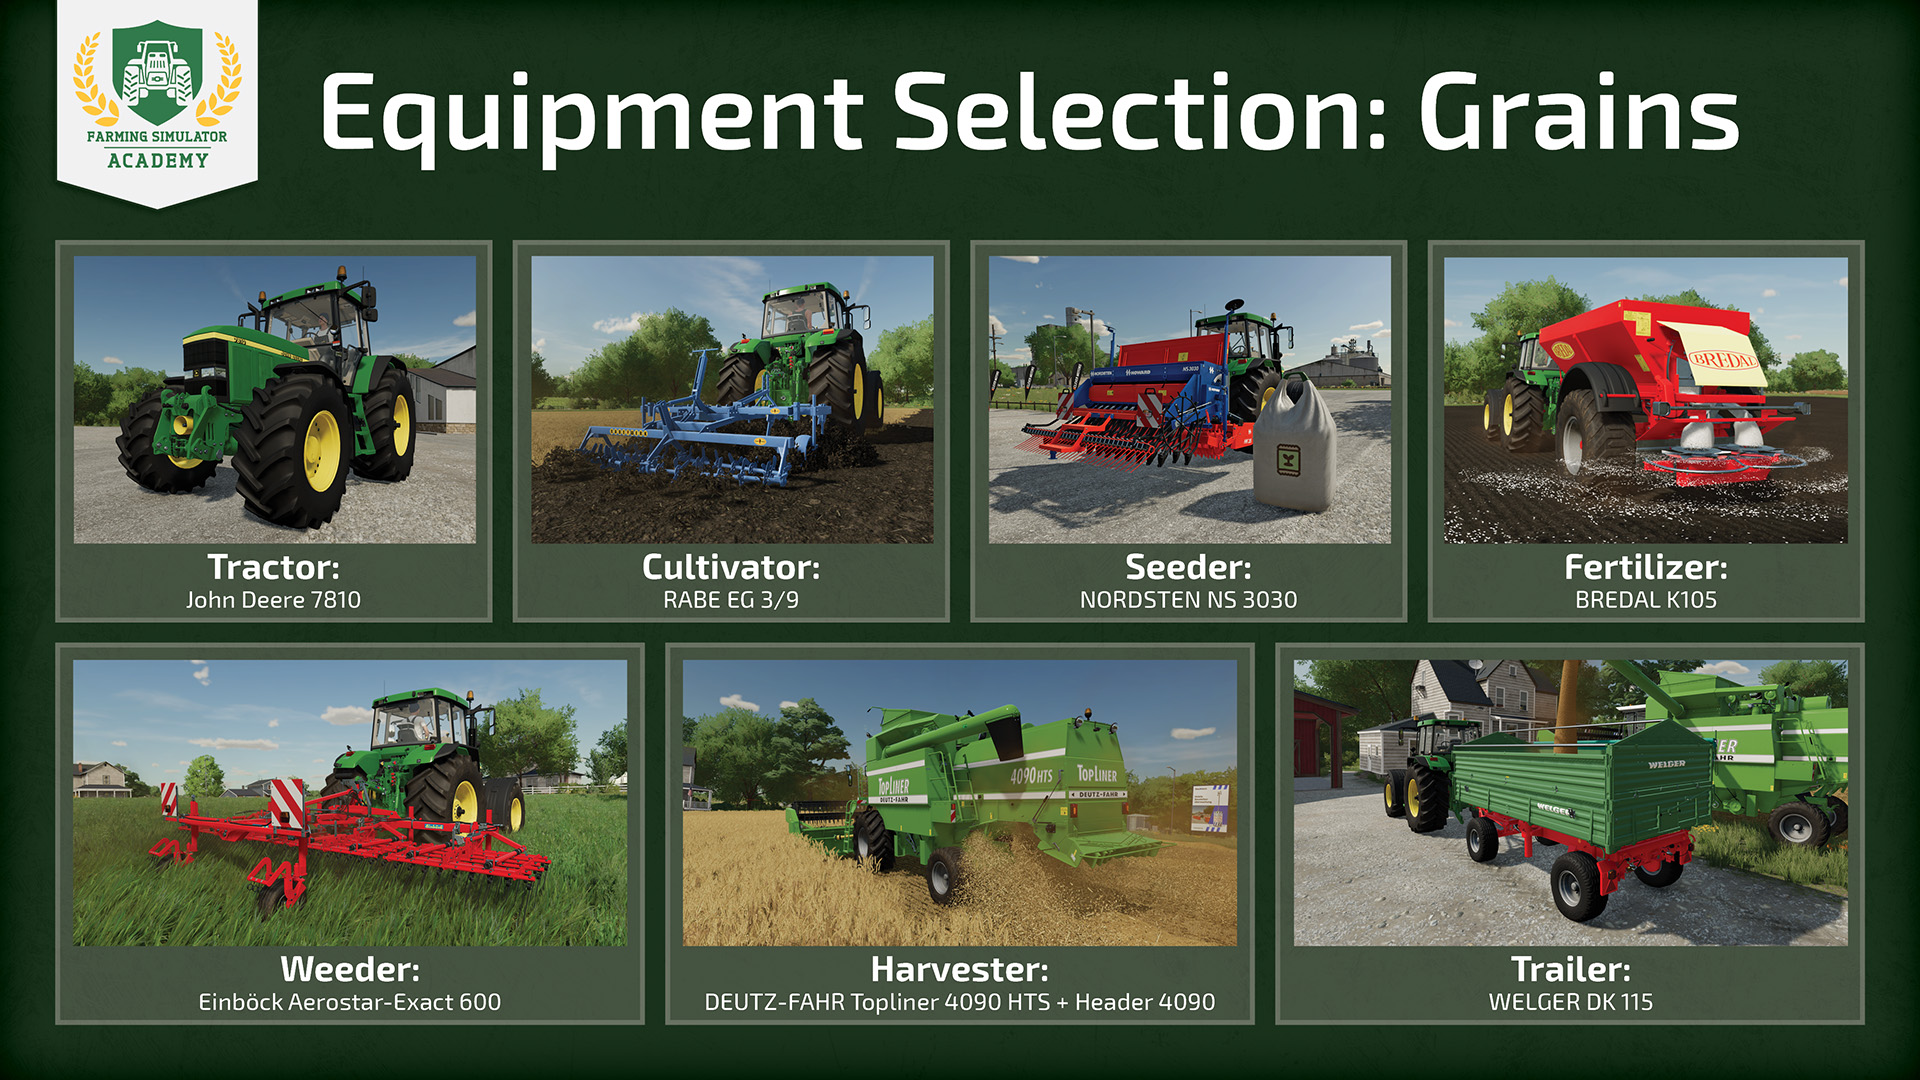
We chose the following equipment. This should be a well-balanced selection for beginners. Of course, you’re allowed to make your own choices. But mind your account balance and compatibility!
Depending on the game mode, some machines are already available at your farm. In "New Farmer" mode, you can use the machines, like the tractor for example, without having to by the one recommended below.
- Tractor: John Deere 7810
- Cultivator: RABE MR 250
- Seeder: NORDSTEN NS 3030
- Weeder: Einböck Aerostar-Exact 600
- Harvester: DEUTZ-FAHR Topliner 4090 HTS + Header 4090
- Fertilizer: BREDAL K105
- Trailer: WELGER DK 115
- Tip! Some seeders (like direct seeders) have in-built cultivators and/or fertilizer spreader. That allows you to carry out multiple tasks in one go!
- Tip! You can rent machines like the harvester, too. It's especially cost-efficient if you're playing with seasonal growth on higher difficulty.
Let’s go to work!
Got everything you need? Then let’s start on your assignment and sow some grains. Choose which one you want to sow. Wheat? Oat? Sorghum? Take your pick. If you play with seasonal growth enabled, though, we advise you to choose canola, since you start a save game in August.
Step 1: Cultivating the field
For grains, it’s usually enough to cultivate instead of plowing. Unless the game tells you to plow the field, we’ll use a cultivator. Get to the field, lower the cultivator into the ground and start cultivating.
Step 2: Sowing the fruit
Get your filled sower attached to your tractor and head over to the field. Mind, that you need to buy seeds at the shop. Fill the sowing machine by standing next to the pallet and clicking the refill button.
Then, over at the field, select the fruit you want to grow. We’ll stick to canola for now. Position yourself at one corner of the field, lower the sower and turn it on. Now you sow the grain, one row at a time. It doesn’t have to be perfect right from the beginning.
Tip! Do yourself a favor and don’t speed up the time while doing this, or the crops will grow unevenly.
Tip! Beehives in proximity to the field increase the yield of canola!
Optional: After you're done with planting, you can also use a soil roller to condense the soil and increase the yield by additional 2,5%. You don't have to, though. If small stones are left on the field, they get pushed back into the soil, so they don't damage your harvester, later.
Step 3: Apply fertilizer (and lime if necessary)
Fertilizer will improve the yield. Click on the bigbag category and buy the Solid Fertilizer Bigbag. Then, hook up your spreader to your tractor, position it right next to the BigBag and click the button to refill. Back on the field, you turn it on and cover the whole field in fertilizer. It should now be fertilized to 50%, look at the right corner box while standing on the field. It’s okay if there are some tiny spots still not covered.
Tip! Repeat the fertilizing process after sowing to increase the fertilization to 100%. The yield will be even higher. With a manure or slurry spreader, you can activate double activation rate to fertilize only once.
Does the field tell you it also needs lime? Then head back to the shop, buy lime and repeat the same procedure. If you have fertilizer left, you can unload it first at your farm.
Step 4: Getting rid of weeds
Soon, the first weeds spawn on the field. Take your weeder to get rid of it before they grow past the first stage. In the first stage, you can still use the weeder to remove weeds. After that, you need a hoe or field sprayer, but let’s try to avoid that in favor of our finances. If you play with crop destruction, use a tractor with narrow tires, otherwise a lot of plants get destroyed. Got rid of it? Good, now we wait again, until the crops are fully grown.
Tip! You can speed up a bit until the weeds start to grow.
Step 5: Harvest the crops
As soon as the crops are fully grown, you shouldn’t waste any time, so they don’t start to wither. Take your harvester, attach the grain header and start harvesting. Lower the header, start the engine and go!
Tip! You can disable plant withering in the game settings.
Step 6: Selling the crops
Since your finances allow only a starting tier harvester, the tank will fill up quickly. Is it filled up to the brink, get the trailer to unload. When sitting in the harvester, click the button to extend the pipe and position it directly above. It will unload automatically until the trailer is full. Now, look for the best-selling point on the prices screen. Since the price of crops varies during the year, you should think about storing it in a silo for later sale. Unload the trailer in the designated area.
Tip! If you got a silo, store the fruit until the market prices are as high as possible.
Tip! The price screen can show you the price fluctuation over the year.
Well done!
Congratulations, you harvested and sold your first load of grains. Take your time and start on the next lesson, when you’re ready. And don’t forget to clean up your machines once in a while. Stay with the Farming Simulator Academy and you become a virtual farmer in no time.


